-
 Bottle components and bottle making process
 -
 Bottle components and bottle making process
Updated at
2023-08-13 12:14:16

In the previous article, we explained some of the necessary points and settings that are important to start the preform process, now we will state other points that should be paid attention to in this process.
This article is a continuation of the description of the previous article:
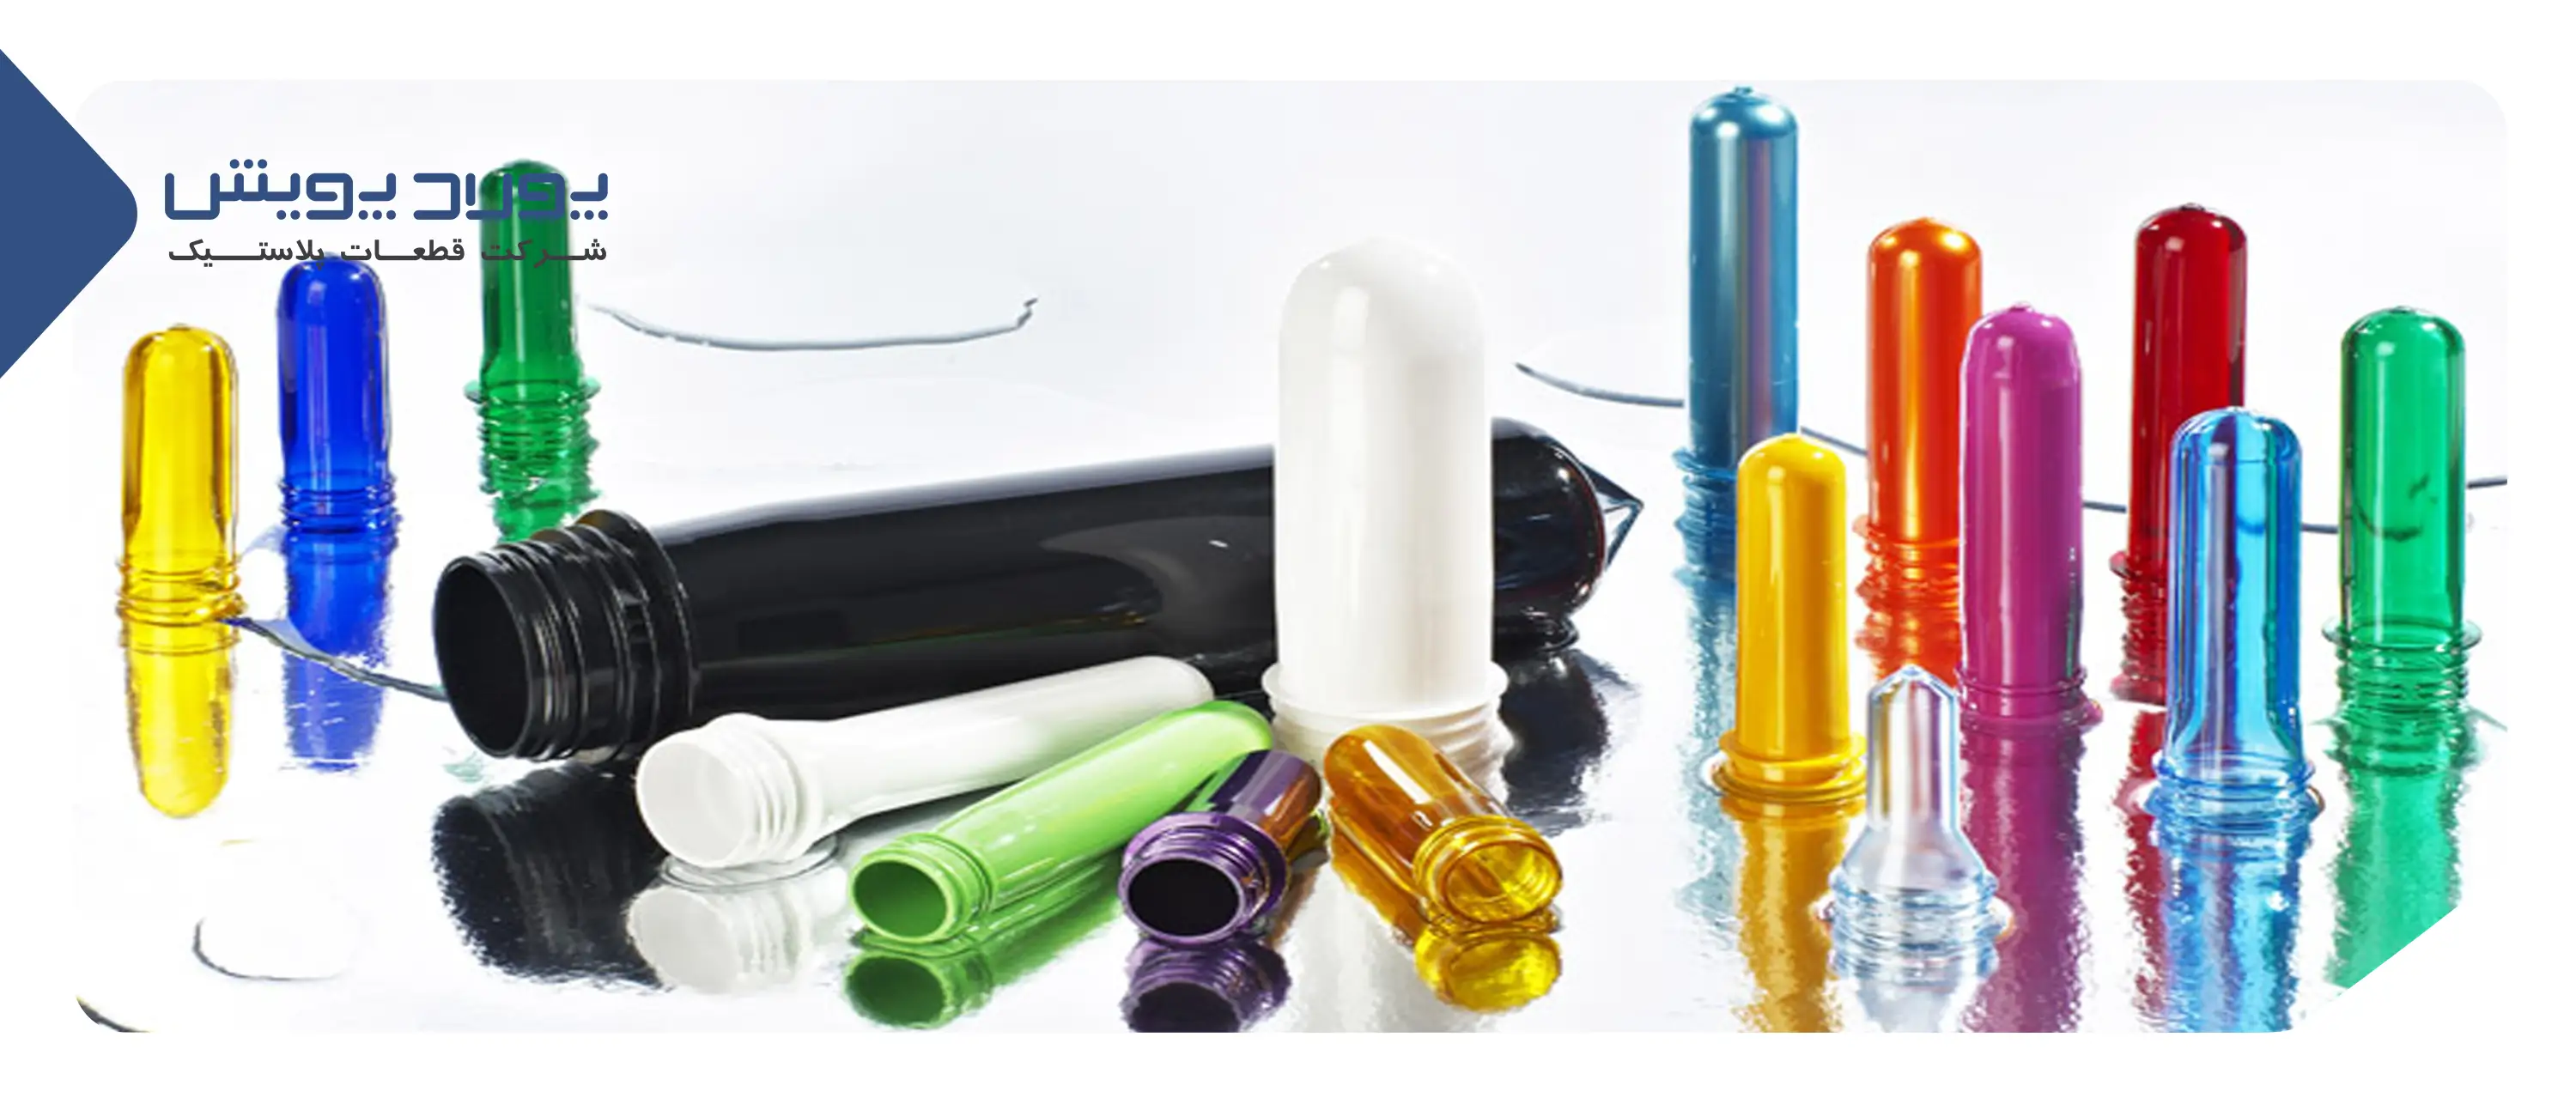
Components of a bottle
A bottle can be separated into the following main components. Each of these components is designed based on its different functions.
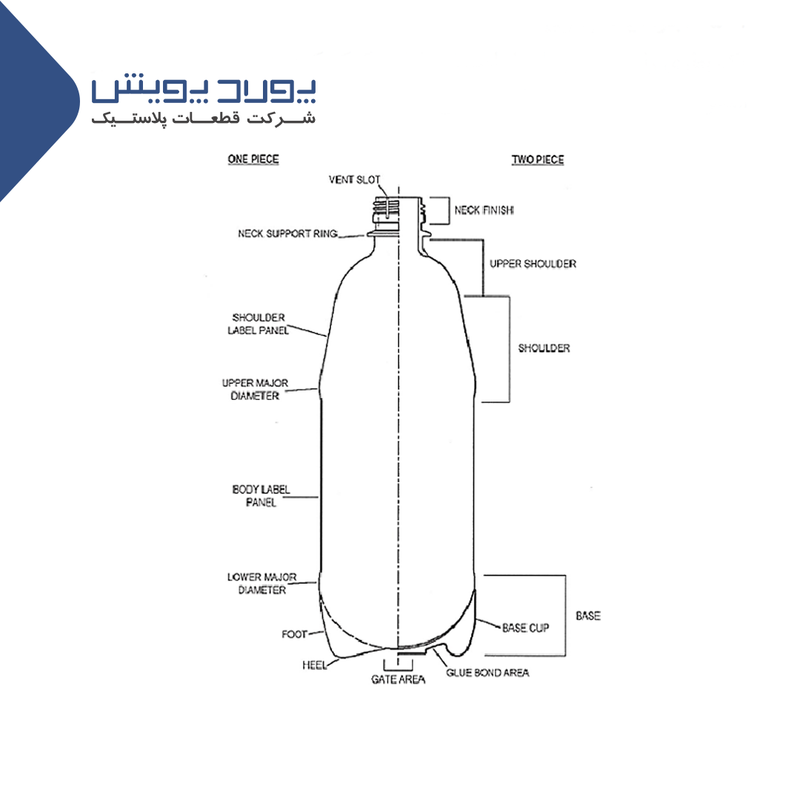
Neck Finish:
It is the uppermost part of the bottle where the lid is closed and the contents of the bottle are entered or discharged from this part. Its upper surface is called the sealing surface, which must be completely intact.
Neck Support Ring/Collar/Transfer Ring
It is a ring in the lower part of the thread, which is designed to transfer preforms and bottles in different parts of the process.
Neck:
This part includes from the lowest rim of the thread to the beginning of the arc of the bottle. Usually the greatest curvature of the bottle is below the neck.
Shoulder:
The part that is located between the neck and the body, which distinguishes the radial extent of this part from the body.
Body:
It is the largest part of the bottle that contains the contents of the bottle. The bottle label is installed in this part.
Base:
The part that makes the bottle stand on a flat surface and should have the necessary strength and stability. The different parts of different bases are marked in the figure.

Making bottles with optimal orientation
At first, it should be said that finding the optimal orientation is not always necessary or possible. For example, when some bottles are too thick (to prevent deformation), in this case you just have to convince the customer to buy the right product.
The process of stretching and blowing round bottles is much simpler than rectangular bottles. Because in rectangular bottles, the near faces are less oriented than the far faces.
Orientation means forcing the material out of the non-oriented state by a tensile force. For example, pasta in a container has a pattern similar to a polymer chain, which is placed in a network pattern by the tension rod and the force of the tail air.
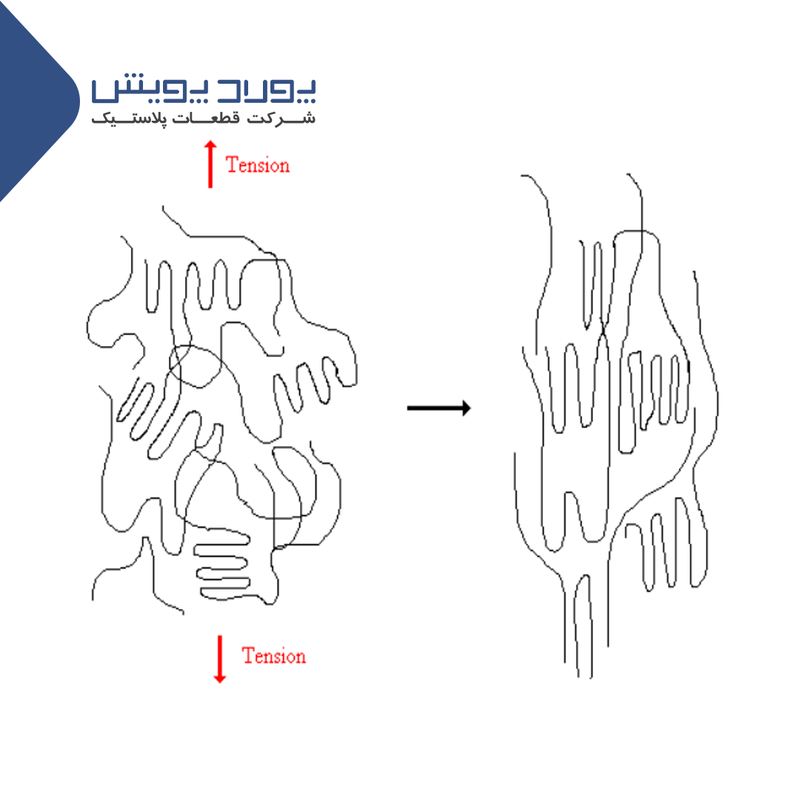
Biaxial orientation and what is called strain hardening are created as a result of two factors:
The highest draw rate and the lowest preform temperature where pearling or bleaching stress does not occur.
But these two features have conflicting interests. This is because the highest draw rates (above 12 to 15) are said to be obtained at temperatures above the optimum temperature, which is about 85 to 100 °C (212-197 °F).
What makes this issue even more complicated is that the temperature shown by the infrared sensors is only related to the surface of the preform and does not show the temperature of the center and inside of the preform.
The operator must know what maximum pull ratio is required. If the stretching rate is below 10, you should try to stretch at the lowest possible temperature.
When a pearlescent (shelling) problem occurs, check if you can direct the material to the area where the bleaching stress has developed instead of raising the temperature of the preform. If it is not possible, increase the temperature of the lamps and the ventilation of the oven at the same time. The goal is to increase the temperature inside the preform because the material is under stress in this place and heat is lost quickly on the external surfaces.
Surface temperatures below 90°C have been proven to be good temperatures for a wide range of applications.
In single-stage machines it is difficult to achieve draw rates above 8 because there is less control over the temperature gradient of the preform. The downward orientation of the bottle will have the greatest effect on its performance in the launch test. Therefore, in most cases, the performance of the bottle should be checked in this test.
If the bottle fails this test, try raising the hold time and cooldown time by 0.05 second increments.
You may have to increase the tail pressure to drive the cold preform into the mold. You shouldn't worry too much about the temperature inside the preform, as it is usually higher than the temperature outside the preform by a default value.
Output control
These components are very different in single-stage (SS) and two-stage (TS) devices.
Two-phase machines:
Every car has a maximum mechanical speed. In rotary machines, it is the speed at which the blow wheel can move, and in linear machines, it is the time it takes to put the preform and take out the bottle in the clamp position, as well as to open and close the mold.
Most machines are classified according to the number of bottles per cavity per hour (b/c/h) (bottles/cavity/hour), which is sometimes misleading, because the reference is the length of the process, which includes pre-blow processes. It is Blow and Exhaust Time, it is not.
The output table is always for 500ml (20oz) lightweight water bottles (without saying how long the process takes).
If you assume that the fastest rotary machine is running at 2.200 (b/c/h), that means it would take 1.63 seconds to form a full bottle. About half of this time is process time, so don't expect to be able to produce a 21g bottle of carbonated soft drink (CSD) this quickly.
Besides the mechanical performance of a machine, other factors can affect and limit the output:
The proper cooling time required to cool a bottle (to prevent the bottle from shrinking)
Oven Capacity: The oven may not be able to heat very thick preforms while the bottle is cooling.
The large size of the bottle (for example, 5-liter containers) that requires a considerable time to brew and fully form them.
Air evacuation time required by large containers.
As an operator, you should be able to determine the minimum cooling time to have a bottle with proper performance. And for this purpose, you can first reduce the brewing time until the base or other parts of the bottle are not completely formed, then the air evacuation time. reduce until the machine stops due to tail pressure in the mold or other similar errors or the tail nozzle rises with noise. Then add 0.2 seconds to the air discharge time. With this method, you will make sure that the air discharge is appropriate. Once you apply these settings, you can find out if the oven system is able to heat your preform at the appropriate temperature or not.
Single-stage machines:
In single-stage machines, the cycle time also depends on the speed required to reduce the temperature of the preform to the appropriate temperature of the tail.
Holding time and cooling time play a role in this case to a greater extent and injection time to a lesser extent. Since the injection time also controls the temperature gradient distribution in the preform, it is better to adjust the injection time accordingly, rather than to control the production cycle.
In most machines, the temperature of the preform is not shown. The operator should check manually without inflating whether the temperature of the preform is suitable for his tail or not. When the preform is at the right temperature, the operator can squeeze the preform with two fingers without the walls sticking together from the inside. If they crystallize (whitening), they are overheated.
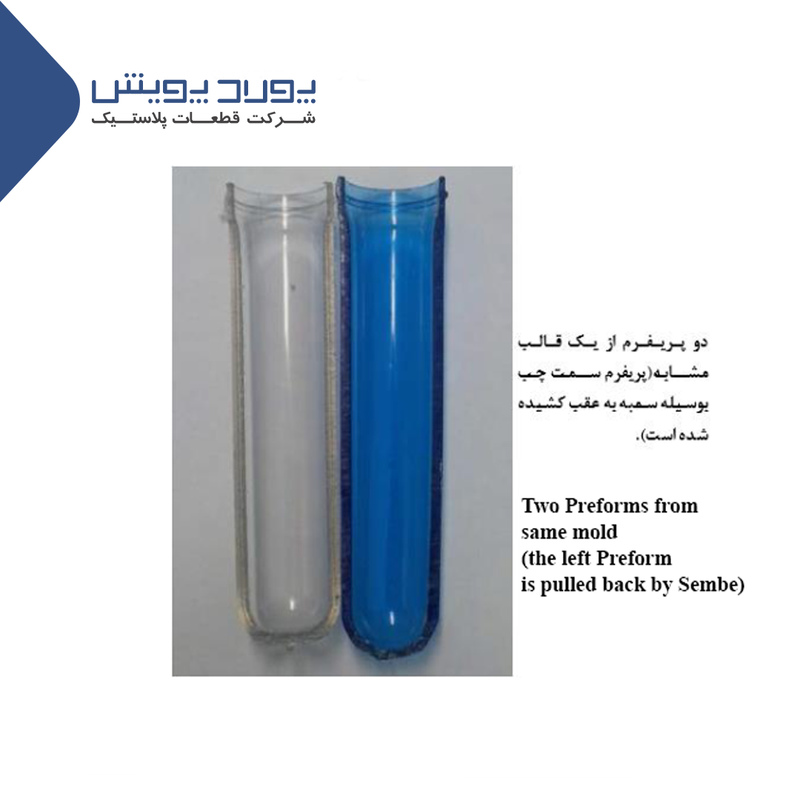
Another drawback, which is rarely seen at high speeds, is that when the preform exits the samba without any breaks, it collapses slightly as it falls from the mold (as shown in Fig.
Preforms that are slightly shorter produce a different bottle. Increasing the angles at the injection site can improve and reduce the probability of this problem.
In summary, the production cycle time in single-stage machines should be associated with the best efficiency to produce the most number of quality bottles.
Sometimes, following parameters that are less effective in reducing the production cycle can have the opposite effect.
Pre-tail pressure adjustment and control
The correct setting of pre-blow pressure depends on the preform temperature, the distance between the preform wall and the mold wall, and the thickness of the preform.
The goal is to produce a bubble that is too large if it hits the walls of the mold, and if there are parts as small as the preform dimensions, it is too small.
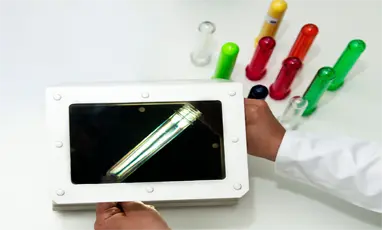
A so-called pre-tail pressure audit is performed on most cars. In this way, the preform is inflated only by the pressure of its tail and the operator is able to see its effect.
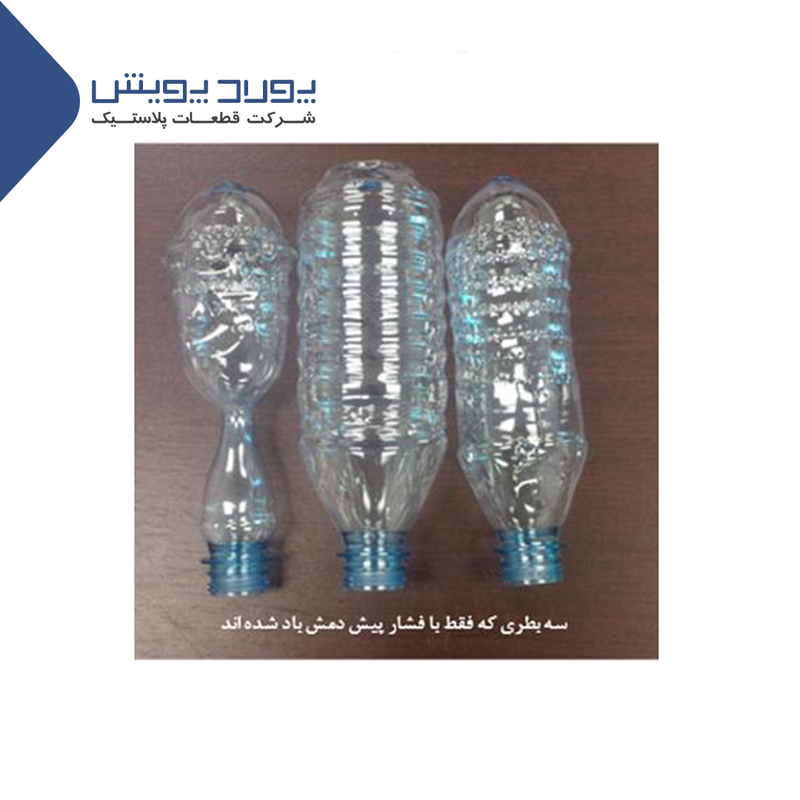
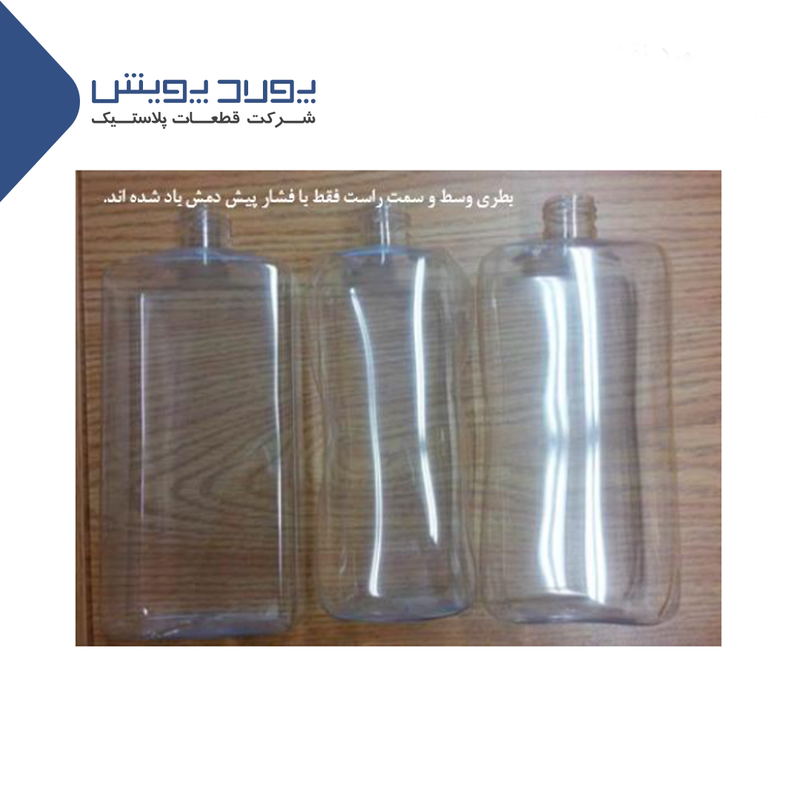
In the figure, three bottles are shown that are inflated only by the pre-tail pressure. In the bottle on the left, the pre-tail pressure is too low and in the middle bottle, the pre-tail pressure is too high. The correct pre-brewing pressure has been applied to the bottle on the right.
It gives a good picture of the effect of pre-blow pressure, but it should be noted that this method is also subject to errors: these three bottles were obtained from three consecutive pre-blow pressure audits in rotary machines. The output of the pre-blow audit process changes as a result of small changes in the preform temperature, the response time of the pre-blow valves or changes in the pre-blow flow control. Especially when the temperature of the preform is increased to a temperature above 100°C in order to use a draw rate above 12%.
It is clear that there is no fixed number and correct value for adjusting pre-tail pressure. Clearly, a preform at 88°C (190°F) requires more pressure than a preform at 110°C (230°F).
This means that you will need to readjust the preform pressure as the preform temperature changes. Pre-inflator pressure values vary from 4 bar (60 psi) to 20 bar (290 psi).
Single-stage machines typically do not have a pre-tail pressure audit feature. Therefore, you may have to manually disconnect the tail pressure input to check the pre-tail pressure. The only way seems to be to put a manual shut off valve after the pre-prime pressure tank (if it doesn't exist) or you can put a timer to reset the pre-prime pressure to zero. Make sure you have at least 3 seconds of pre-push time (you can leave this setting off as it has no effect after the pre-push delay has passed). It is obvious that according to the degree of inflation of the bottle, it also has an effect on the application of pressure before the bottle. In addition, the heat of the viscous melt also plays a role in this case.
The temperature of molten PET in a single-stage device
Melted pet does not have a uniform temperature in Quettas. At the end of the mold (when you look from the front of the machine) the temperature of the preforms is higher and the bottle is thinner in those areas. This issue is not related to the malfunction of the device, but rather its feature. In some cases, reducing the injection speed or changing the ventilation components in a way that is more in contact with the hot parts (which is very difficult to adjust properly) can be effective.
As a last solution, the flow of water in the sump or matrix can be applied preferentially. In other words, he linked the injection chambers with the balloon chamber. You can optionally cool the injection molds or quills by redirecting the water flow or blocking the flow between the mold walls and the water, which is a time-consuming process that requires precise drawings to be repeatable. But as said, you have to do what it takes to produce a good quality bottle.
How is the elongation ratio (rate) calculated?
There are four different elongation ratios that can be calculated:
Axial Stretch Ratio: The length of the bottle divided by the length of the preform, measured from the same point.
Outside Hoop Stretch Ratio: The outer diameter of the bottle divided by the outer diameter of the preform.
Inside Hoop Stretch Ratio: The inner diameter of the bottle divided by the inner diameter of the preform.
Average Hoop Stretch Ratio: The average diameter of the bottle divided by the average diameter of the preform.
Any of these ratios can be used. Since there is no significant difference between the inner diameter and the outer diameter of the bottle, so it is the diameter of the preform and actually its thickness that determines the ring tension ratio.
Using the design and dimensions shown in the figure, we calculate these relationships for the preform and the bottle.
Note: The parts that are not drawn are not counted.
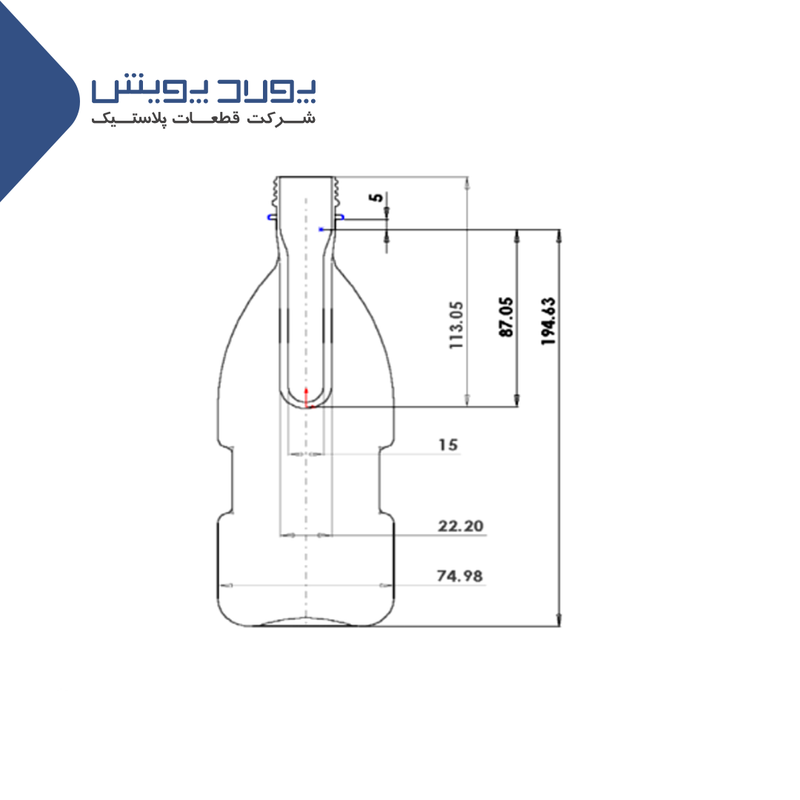
Axial elongation ratio: 194.63 ÷ 87.05 = 2.2
Outer ring elongation ratio: 7.98 ÷ 22.2 = 3.4
Elongation ratio of the inner ring: 74.58 ÷ 15 = 4.97
Average ring elongation ratio: 74.78 ÷ 18.6 = 4
Note: Note that the elongation ratio of the inner ring is 46% higher than the elongation ratio of the outer ring. In fact, this is because the pearling defect always occurs on the inside, because this area is stretched much more.
To calculate the amount of stretch that is useful for different parts of the preform, the stretch ratio or the total expansion ratio (multiplying the internal stretch ratio by the longitudinal stretch ratio) should be calculated.
(Draw Ratio) Draw ratio: 2.2 x 4.97 = 9.10
Empirical knowledge shows that a stretch ratio above 10 is required for CSD bottles.
A draw ratio above 12 requires temperatures higher than the recommended temperatures. (between 90 and 100 degrees Celsius)
Note that often only a very small percentage of preforms need to be stretched this much and therefore need this stretch rate.
Calculating the average tension can be useful for judging whether the preform design is suitable for the bottle in question.
Average stretch ratio : 2.2 x 4 = 8.8
Qualitative review of the preform
All defects observed in the bottle are not due to defects in the brewing process. Therefore, it is necessary to inspect the preforms in terms of quality.
Some of these inspections include the following:
Weight
Physical dimensions and uprightness
Wall thickness distribution
Body crystallinity
pollution
bubble
turbidity (whiteness)
Uniformity of preforms
Note: Visually inspect preforms randomly. Of course, it is not intended to identify a defective neck, but a shipment with a large number of deformed or incomplete necks may be identified with this method.