-
 Fixing the problem of the bottle, problems and suggested solution-1
 -
.webp) Fixing the problem of the bottle, problems and suggested solution-1
Fixing the problem of the bottle, problems and suggested solution-1
Updated at
2023-07-22 06:31:52

Fixing the problem of the bottle, problems and suggested solutions
So far, we talked about preform, its additives, how to produce preform and the effect of temperature and physical and chemical properties on it.
Usually, defects occur during preform production and bottle inflation, and knowing the defects and their causes, as well as their solutions, can help to prevent them to some extent.
Now, in this article titled as a guide to solving the problem of the bottle, we will examine the problems and suggested solutions.
After the introduction and description of the problem, in most cases, the photo that shows the problem, the reasons that cause these problems, along with the proposed solution for that problem, are stated.
In this article, the reason for the problem is marked with ×× and the proposed solution is marked with ++.
Since there is a significant difference between single-stage (SS) and two-stage (TS) processes in bottle production, if the reason or solution is true for only one of these two processes, the titles of single-stage and two-stage are placed in front of them has taken. If this title does not exist, that reason or solution is valid for both processes.
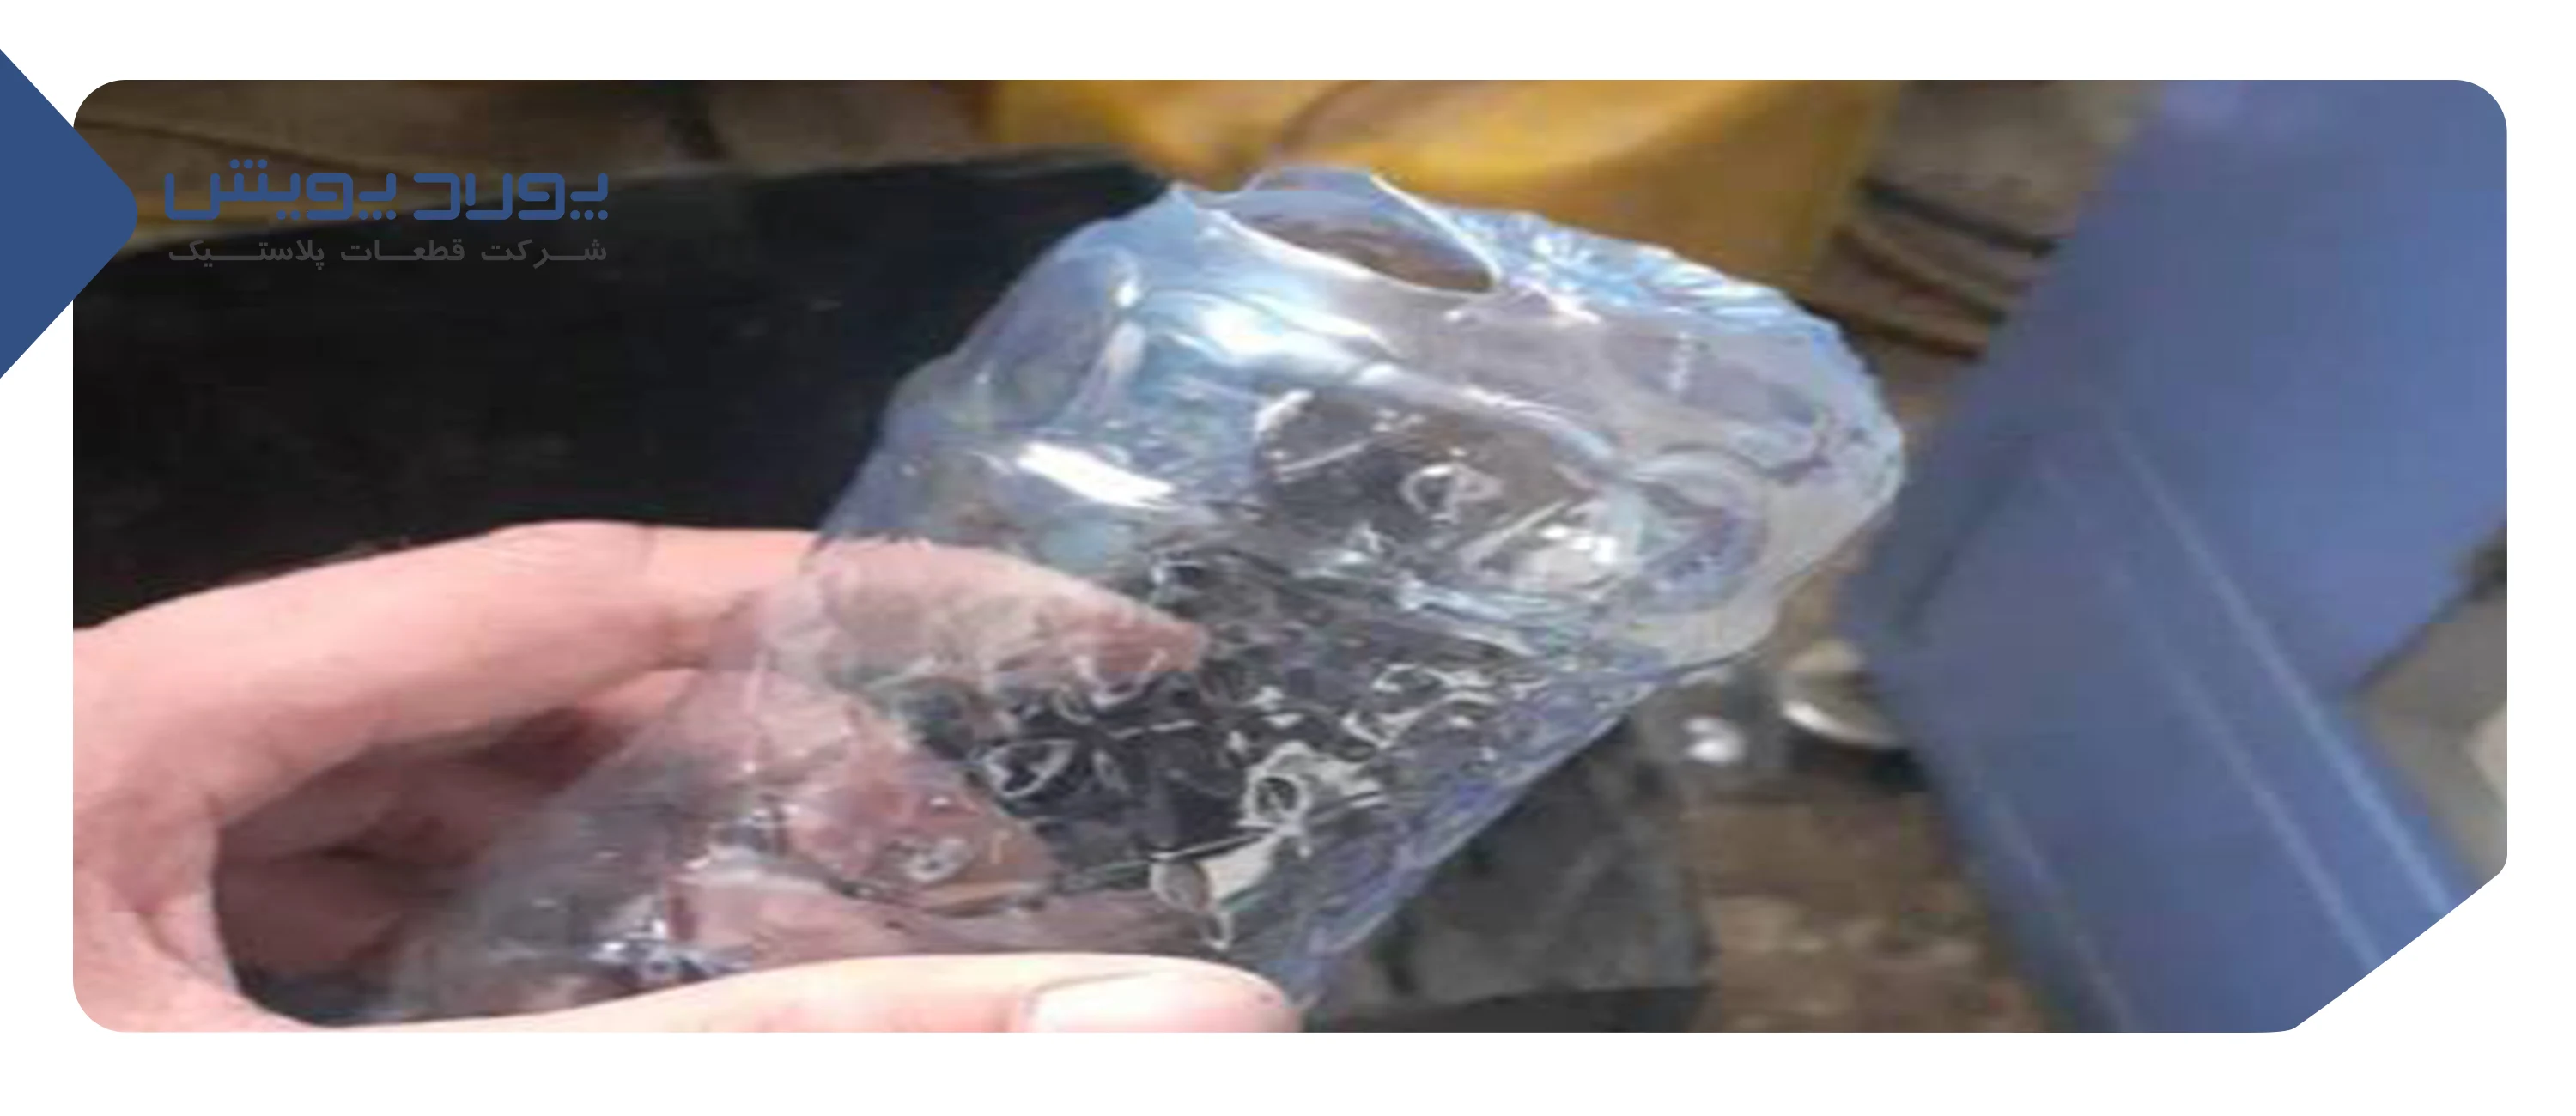
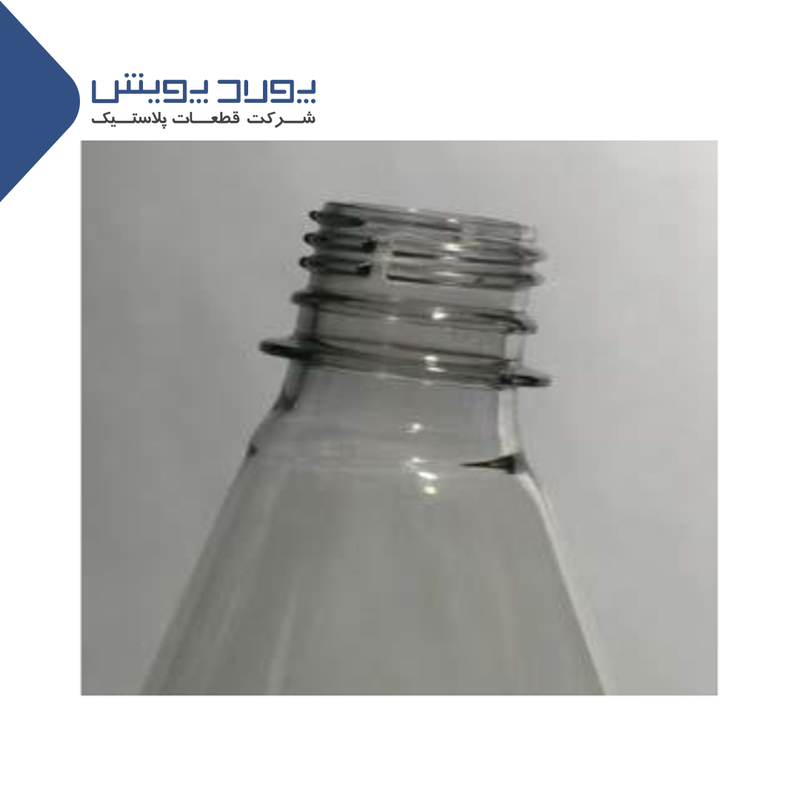
Band in Bottle Body connection line
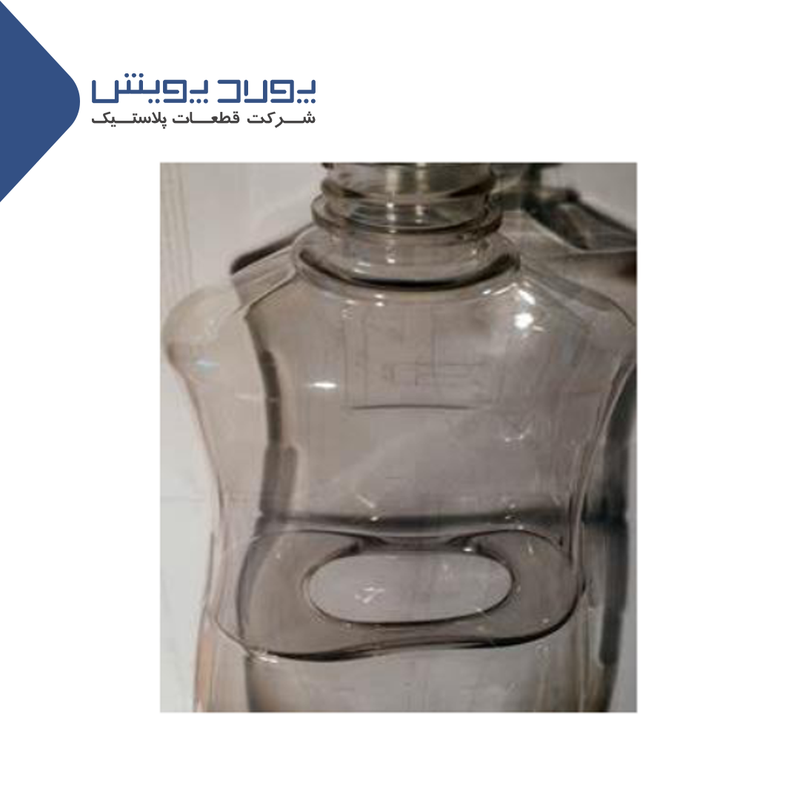
Description of the problem:
A thin plate is created from the side of the bottle wall towards the center of the body. A ring of uninflated material is formed in each part of the bottle body during stretching, which turns a single bubble into two bubbles.
The reasons for the problem and the proposed solution:
Problem: the preform falls with the movement of the tension rod (longitudinal expansion of the preform)
×× Preform pressure is applied late, with too little to inflate the preform:
++ Reduce the preload delay.
++ Increase pre-brewing pressure.
×× The heat is non-uniform.
(Two-stage) Reduce the temperature of the central part of the preform and then increase the temperature of the other parts simultaneously.
(Single-stage) Change the Conditioning Core so that the temperature of the preform in the core areas is reduced.
more details:
When the tension rod moves towards the end of the mold, the volume of the preform increases (it doesn't matter if the tension rod moves up or down). If no pre-blowing pressure is applied by the movement of the draw bar, or if the pressure is insufficient, the stretched preform contacts the draw bar or the other side of the preform wall and forms a knot.
Preform temperature changes are very rare in single-stage machines, unless there is a cooling problem.
Preform temperature is mainly controlled by wall thickness, ventilation chamber (if present) and injection time. If there is no ventilation, change the injection time to change the temperature gradient in the preform.
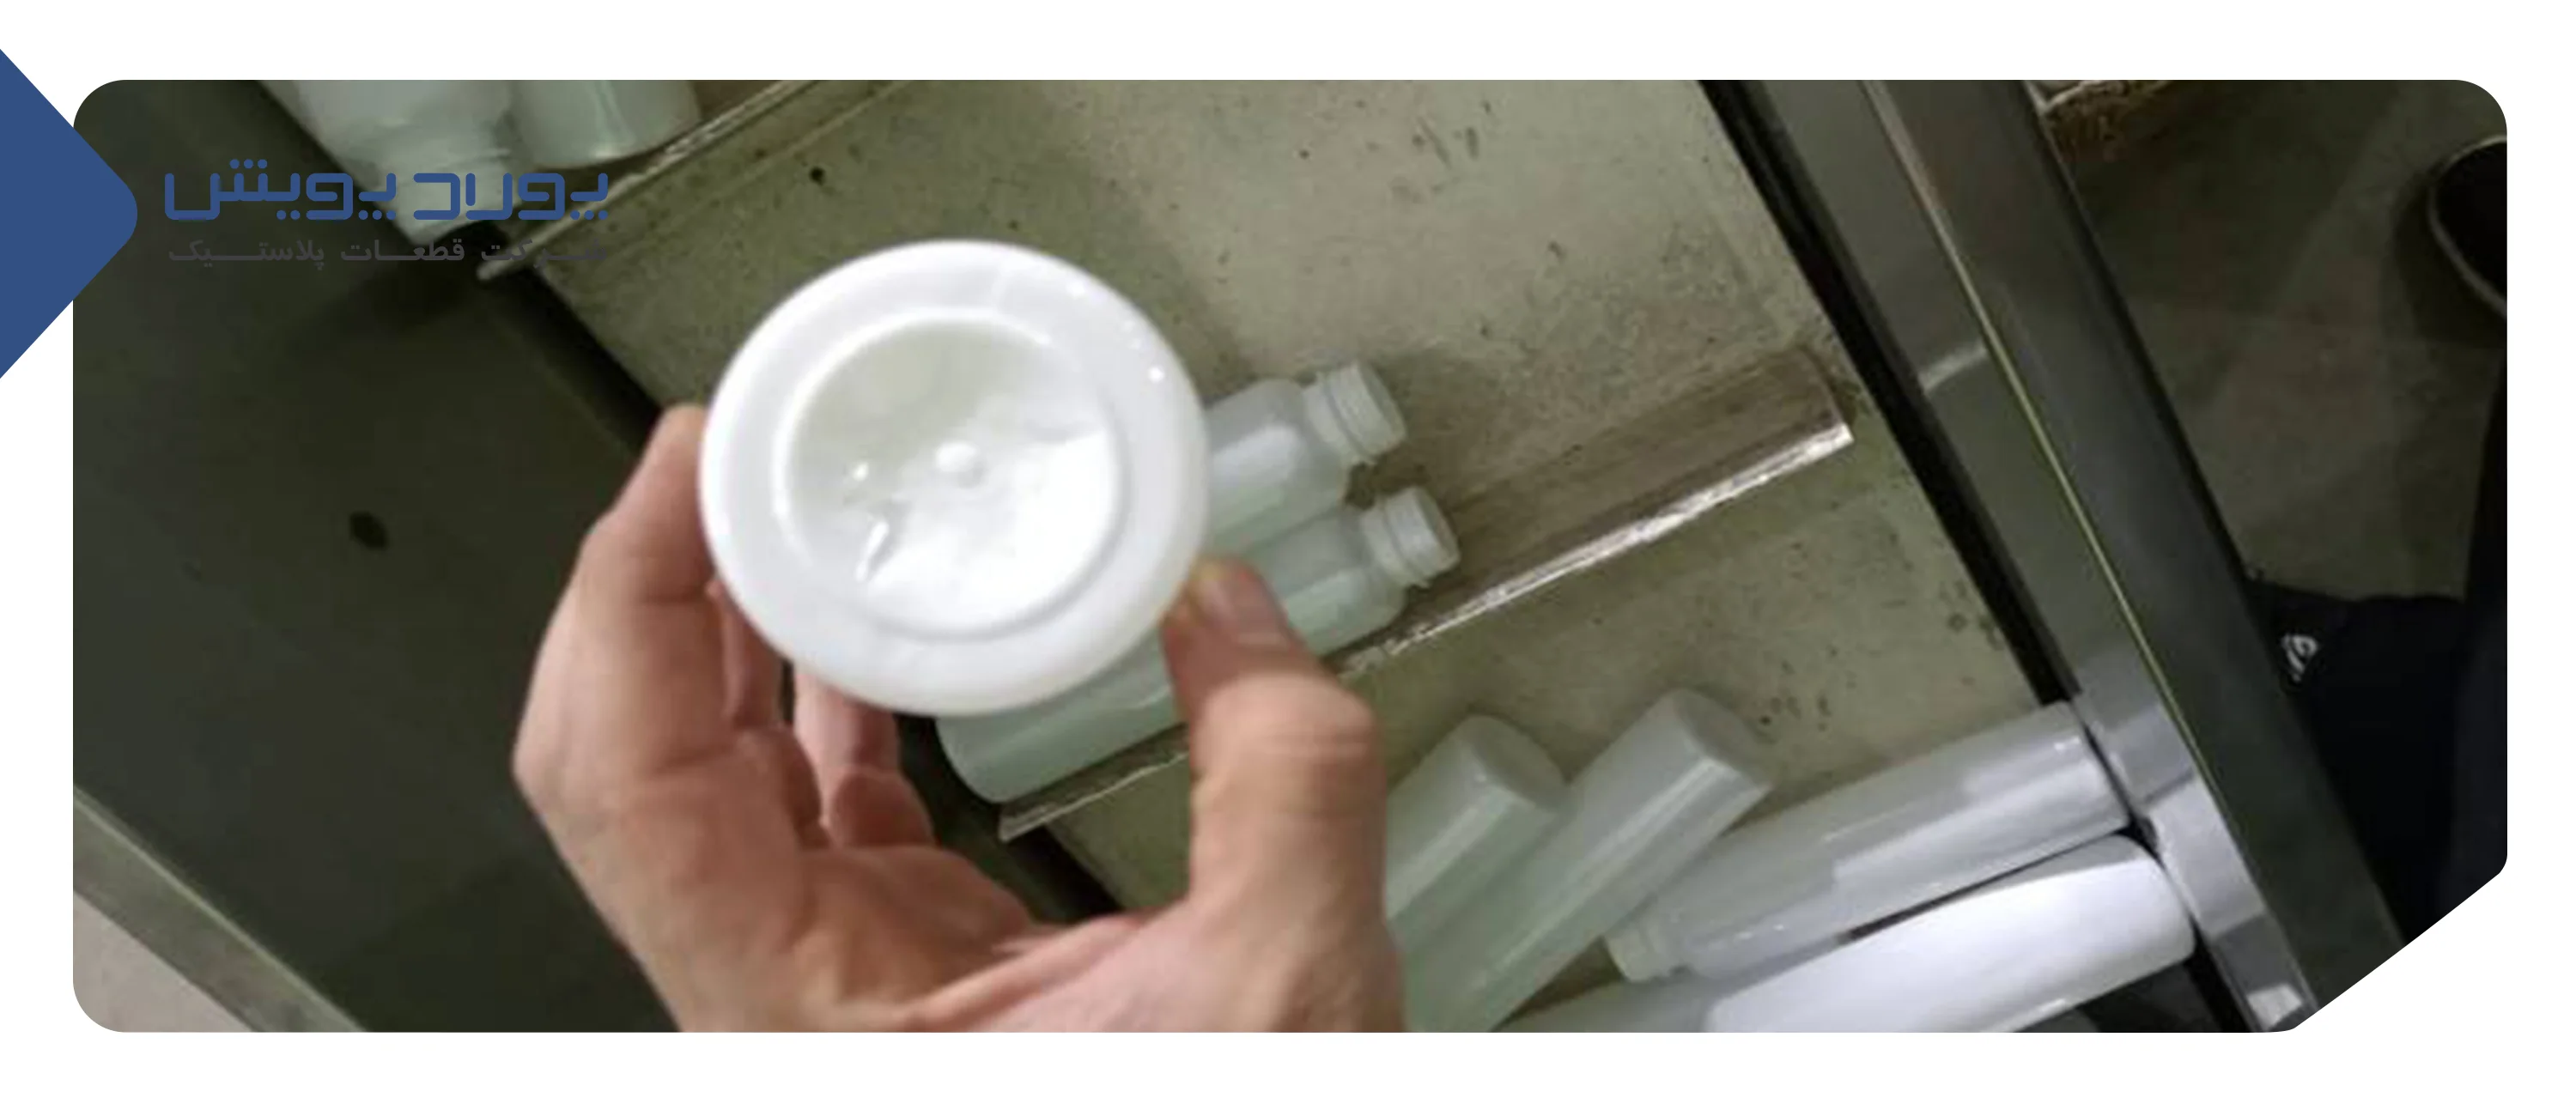
Base Fold (close button)
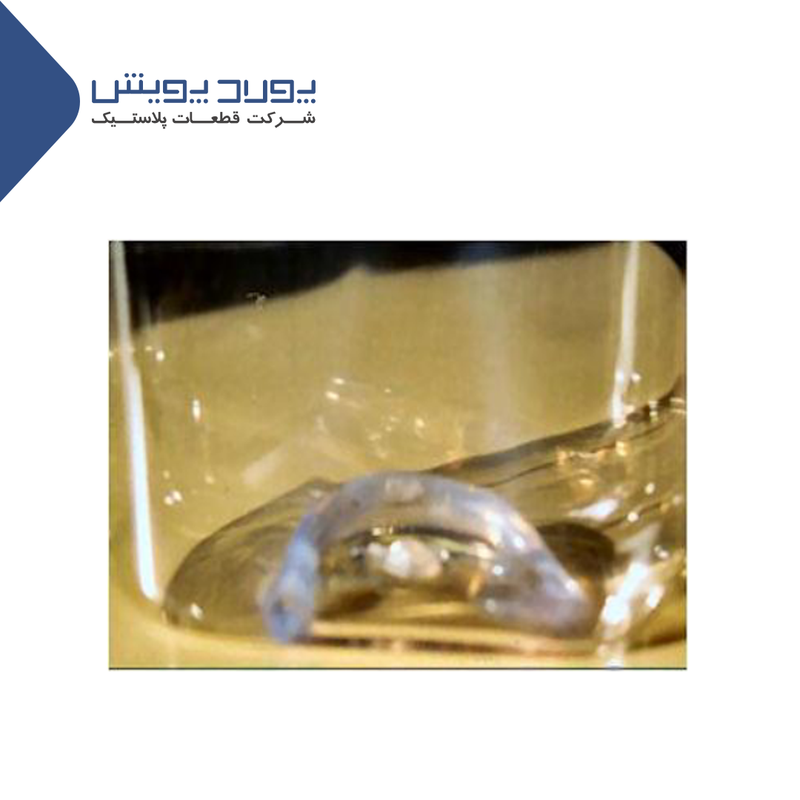
Description of the problem:
The material around the base of the bottle (around the injection inlet) folds or gathers before creating a uniform layer.
The reasons for the problem and the proposed solution:
1) The temperature in preform injection inlet areas is too high.
×× (two-stage) The preform is overheated in the areas around the injection inlet due to the high temperature of the lamps:
++ Reduce the temperature of the end part of the preform.
++ (single stage) Change the Conditioning Core to cool the preform injection inlet.
×× (single stage) injection time is very short:
++ Increase the injection time.
×× (single stage) holding time is too low:
++ Increase the holding time.
2) Pre-tail pressure is applied late or is too low:
++ Reduce pre-tail delay by cam or timer or reduce waste time. (Si dl e device)
++ (single stage) Reduce the tail pressure delay by 0.02s and continue until all injection inlets are off-center, then add 0.03s.
++ Check the operation of the cam (Cam) or the time regulator (timer).
more details:
Excessive heating of the areas around the preform injection inlet causes its shape to change around the stretch rod.
Also, if the air pressure is introduced too late, the thick areas around the injection inlet will cool and become harder to pull. Therefore, applying the pressure of the preform more quickly and applying the pressure of the end when the tension rod has reached the end of the preform usually solves this problem. It may be necessary to reduce the temperature at the end of the preform.
Waste time is a term used in Si del machines, which starts from the time the tension rod is fully lowered and is the delay in the start of tail pressure. This time can be useful to increase the thickness of the angles, but this value should not be excessive.
In single-stage devices, there is often no switch or tool to adjust and apply the air pressure, and the air pressure is applied by a timer.
Therefore, to know when the drawbar is fully extended, the tail pressure delay can be reduced until all the bottles are off-center (the injection inlet being off-center in this condition indicates that the tail pressure is It will be applied very soon). Then increase the delay time until the injection inlet returns to center.
In order to reduce the temperature at the end of the preform, make sure that the cooling system works well. (Especially in narrow pipes where a lot of power is needed to circulate cool water in them). Increasing the holding time and injection time will reduce the overall temperature of the preform but may also make inflation more difficult.
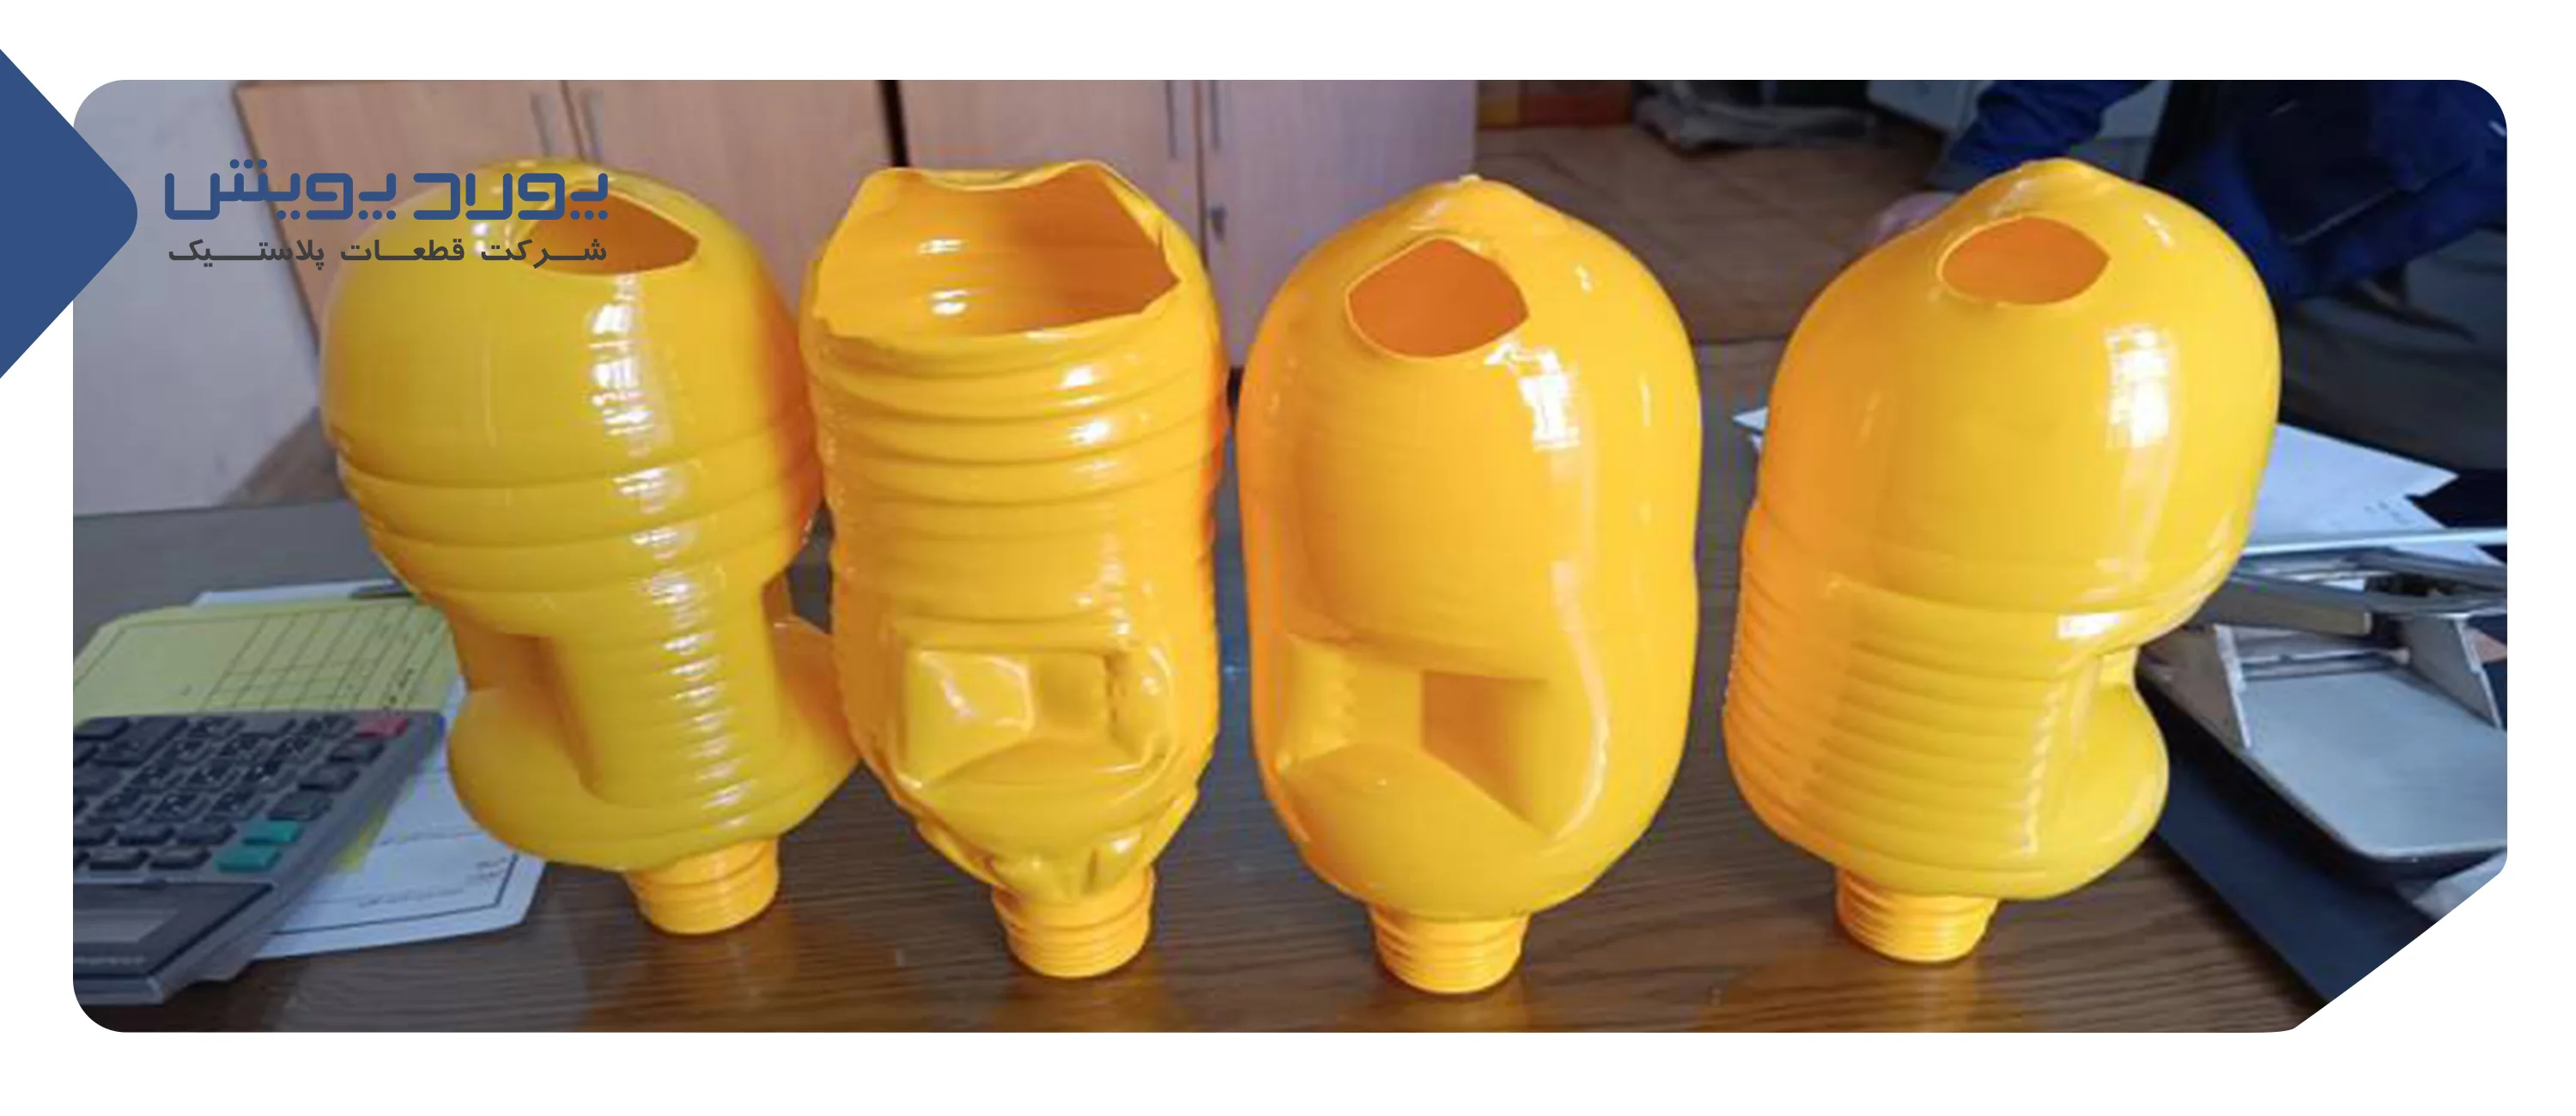
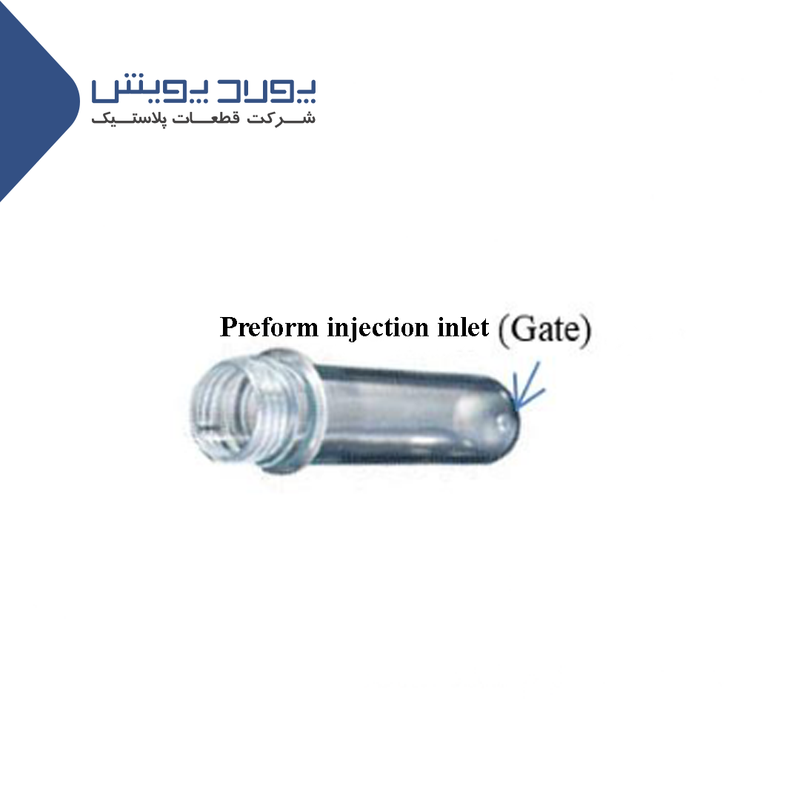
Base rupture

Description of the problem:
By hitting the end of the preform, the tension rod creates a cavity or thins the shell, resulting in leakage and tearing at the impact site.
The reasons for the problem and the proposed solution:
1) The preform is too cold and the draw bar hits the end of the preform.
×× (two-stage) The lamp temperature is generally low:
++ (two-stage) Increase preform temperature, add a percentage to all bulb temperatures.
×× (two-stage) the oven air discharge is excessive:
++ (two-stage) Reduce the venting in the oven until the temperature reaches about 185°F (85°C) or lower.
×× (single-stage) holding time or cooling time is long:
++ (single stage) Reduce the hold or cooldown time by about 0.5 seconds.
×× (single stage) The thickness of the preform wall at the injection entrance (Gate) is too low:
++ (single stage) Change the ventilation sump to cool the preform injection inlet area. Increase the ventilation time if the ventilation tube is in contact with the injection inlet. You can also reduce the temperature of the ventilation water.
2) The preform injection inlet area is overheated. While other parts of the preform are very cold:
++ (two-stage) reduce the heat in the preform injection inlet areas and simultaneously increase the temperature of other parts of the preform.
more details:
In a relatively easy way, you can determine which factor caused the break in the base: the base being too hot or the preform being too cold.
If the base is thick at the fracture site (as thick as shown in the photo), the coldness of the preform has caused this problem.
But if the separation, tearing is accompanied by the thinning and elongation of the bottle base, the temperature of the preform in the oven in the injection inlet areas was too high.
Remember that a preform will stretch well when all areas are at the proper stretch temperature.
If the end of the preform is too thin, it will overcool.
In single-stage devices, the injection inlet temperature can be increased separately from the body. Also, by increasing the injection speed, the temperature difference between the injection inlet and the neck decreases.
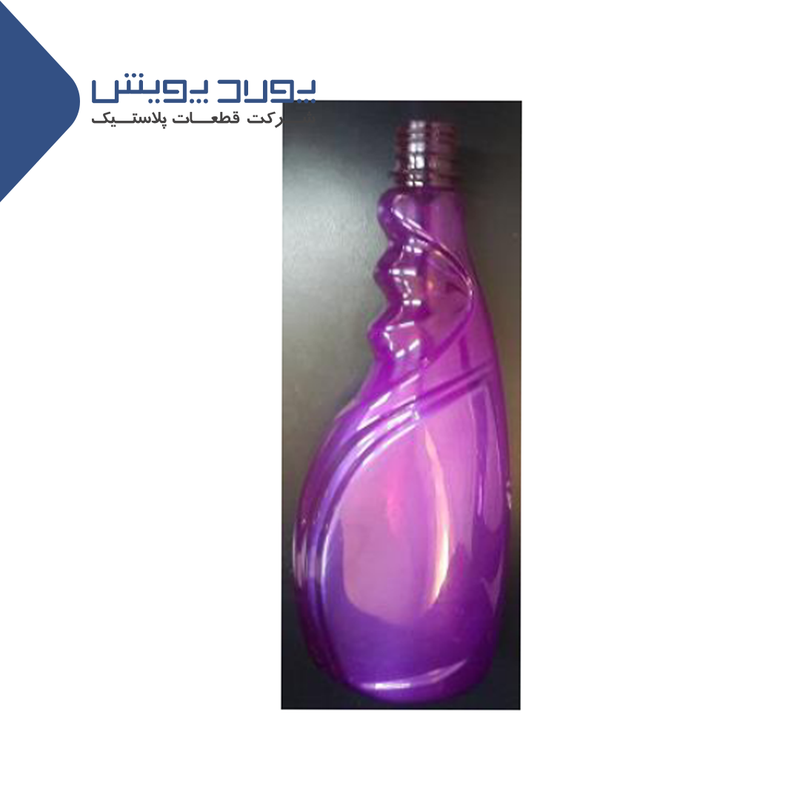
Bent Neck
Description of the problem:
Neck (throat) is crooked or twisted.
The reasons for the problem and the proposed solution:
1) The throat is too hot.
×× (two-stage) temperature is high in zone 1 or 2:
++ (Two-stage) Reduce the temperature in zone 1 or 2.
++ (two-stage) Lower the overall temperature by reducing the temperature of the lamps or increasing the ventilation.
++ (two-stage) reduce the working temperature of the preform.
++ (two-stage) check the suitability of the cooling temperature in the neck part of the mold.
2) The preform is not properly inserted into the inflatable mold.
×× Any type of collision when the preform is placed inside the bottle mold:
++ (two-stage) check the position of the insulator (mandrel) and belts related to the inflator, including their height.
3) There are chances of accidental collision of bottles after inflation (based on the law of probabilities).
×× After the bottles are inflated, while they are still hot, they collide with each other or with another object from the neck:
++ (two-stage) gripper timing to be controlled.
++ Check whether the bottle hit an obstacle in the production line or not.
++ (One-stage) Check the bottle outlet section and make sure that the two neck splits of the mold are fully open and the bottle comes out without hitting an obstacle.
more details:
Neck bending rarely occurs in single-stage machines, where the preform neck and bottle are in safe condition. But it is seen in two-phase devices.
Usually, in order to transfer more materials from the neck (throat) area of the preform to other parts, they increase the temperature of areas 1 and 2, which can cause the neck (throat) to overheat and as a result bend it. In this situation, you can reduce the temperature of this area and other areas at the same time, so that in addition to reducing the temperature, the temperature gradient is maintained, but it may cause excessive cooling of the preform. In this case, use a 2% increase and check its effect. If bleaching or pearling (shelling) stress defects are observed, the preform is too cold.
In some cases, it is also better to check the height of the oven and the direct bulb (1) of the subglottic area.
Increasing oven venting will also be useful because it makes the outer environment of the preform cooler than the inside, and as a result, more elongation is created inside the preform.
Also, for more penetration, you can use longer lamps with less number, because the temperature inside the preform will increase without overheating the preform.
In the single-step method, when the preform is thrown out or taken by the robot arms, there is a possibility of the throat being deformed due to the collision with an existing foreign object. High-speed cameras can also be used to detect them.
Blown out Neck Finish
Description of the problem:
The bottle thread is wide or oval.
The reasons for the problem and the proposed solution:
1) Neck area is too hot during inflation:
++ (two-stage) reduce the heat of lamp 1 or 2 or both or increase the ventilation.
++ (single stage) increase holding or cooling time or decrease melt temperature.
2) Open the clip along the tail.
There is a problem with the locking mechanism, pressure compensation or hydraulic pressure:
++ Control hydraulic lock settings. If the pressure is working properly, the cylinder may be leaking internally and the oil will push the piston back. Check the correct operation of the compensating pressure valve.
3) The diameter of the neck of the bottle mold is too large.
++ Check the dimensions of the template.
4) (two-stage) Mandrel of the oven is overheated and transfers heat to the neck.
more details:
If the dome blow nozzle, which keeps the pressure inside and outside the neck the same, is not present, the neck area will be stressed when air is blown into the preform. This pressure increases proportionally to 2 tubs (square) of the inner diameter of the neck. Therefore, the biggest problem is observed in necks with a diameter greater than 43 mm. In this case, if possible, use a lower blow pressure.
Many two-stage machines have a pressure compensation that equalizes the force in and out of the neck, which greatly reduces the possibility of the clamp opening. But sometimes the compensating pressure valve may not work properly.
In a two-stage device, increasing the distance between the neck and oven, or even sometimes not using lamp 1 (for necks with a diameter greater than 70mm) can be useful to reduce the effects of lamp 1 on the neck.
If in standby mode or when the preform is not placed on the oven insulators, if there is no lamp temperature reduction system to reduce the temperature of the lamps, the insulators will get so hot that this heat can be transferred to the neck of the preform.
In single-stage machines, there is a taper lock between the neck and the tail nozzle, which may need to be checked (although this is rare). In some machines, the closing of the blow mold cylinder is controlled by a check valve, which may not work well.
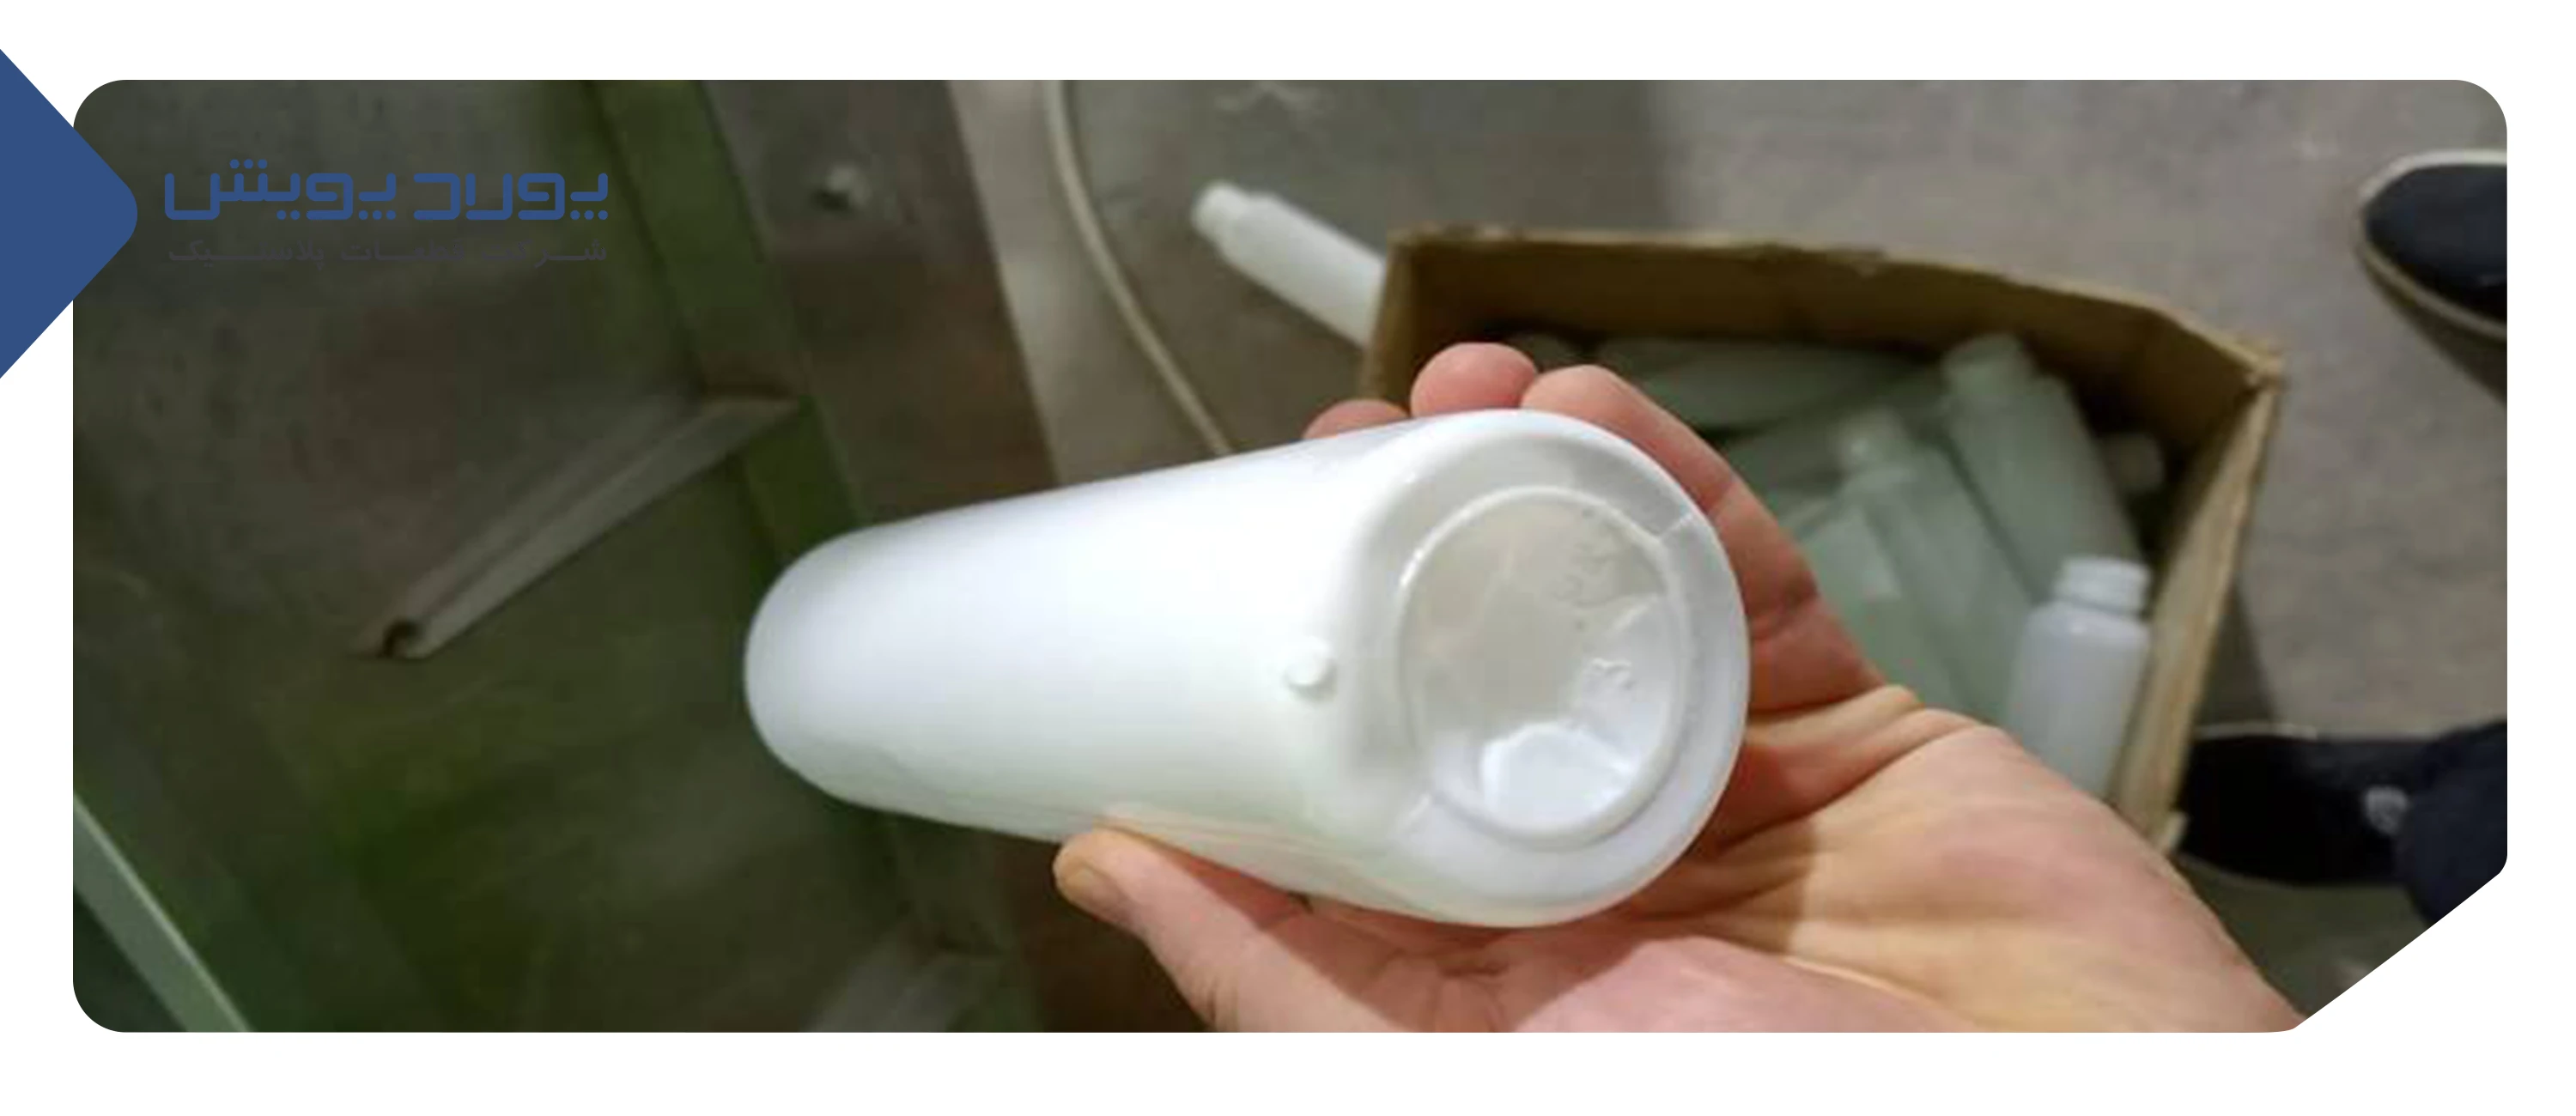
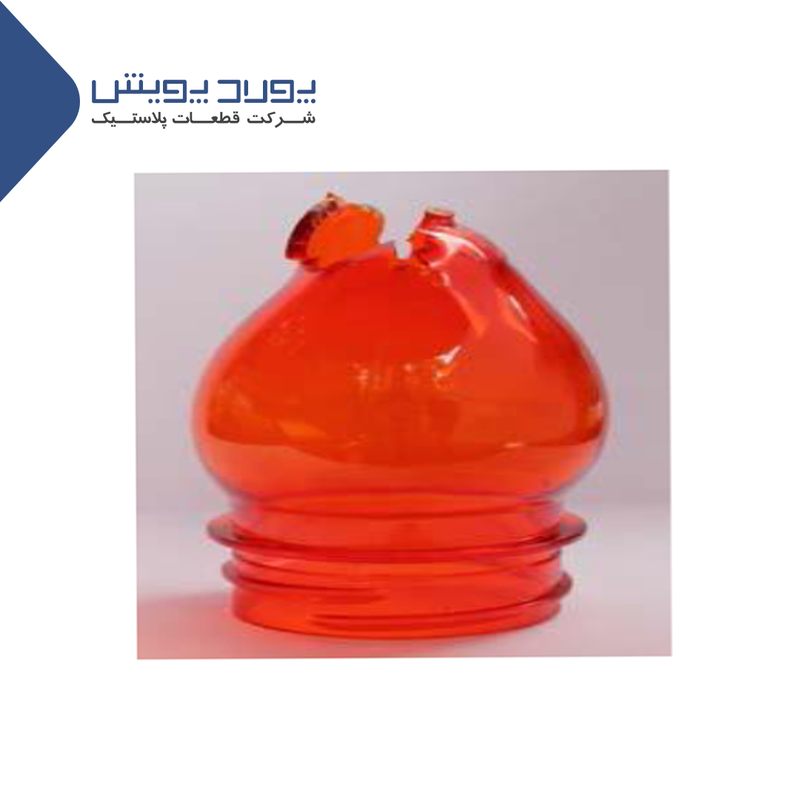
Cracked injection inlet Cracked Gate
Description of the problem:
The injection inlet area shows cracks after inflation.
The reasons for the problem and the proposed solution:
1) The base of the preform is too cold.
×× The preform injection inlet is very cold and does not withstand the impact of the tension rod:
++ (two-stage) Increase the temperature of the lamp at the end of the preform, which will also thin the base of the bottle. If this reduction in thickness is not desirable for you, reduce the overall temperature of the preform while maintaining the temperature gradient.
++ (single stage) Increase holding time or cooldown time.
2) The entrance area of preform injection is not well formed during injection molding.
×× Several defects in the preform production process may cause this defect:
++ (two-stage) check preform injection input.
++ (single-stage) Check the area around the preform injection entrance to make sure there are no holes or deformations. Reduce the last holding pressure or any other stress at the injection inlet.
3) The drawbar speed is too high, especially when the drawbar tip is thin.
×× The pressure applied to the preform injection inlet increases with the reduction of the area of the impact area. When thin rods are used for the pull or the tip of the pull rod is thin and the speed of the pull rod is high, the injection inlet may not withstand the impact strongly:
++ Reduce the speed of the tension rod with the help of a pneumatic cylinder or speed reducer cams.
++ Use a tension rod with a larger diameter.
more details:
This defect is mostly observed in two-phase devices. The injection inlet is too hot to crack in single-stage devices.
A pull rod operated by a pneumatic cylinder from below is usually too weak to cause a problem, but if it moves from top to bottom, it can.
Some rotary machines have more than 4 speed cams, you may have to switch to the slowest cam.
Consider the temperature gradient when you increase the temperature of the area around the injection inlet.
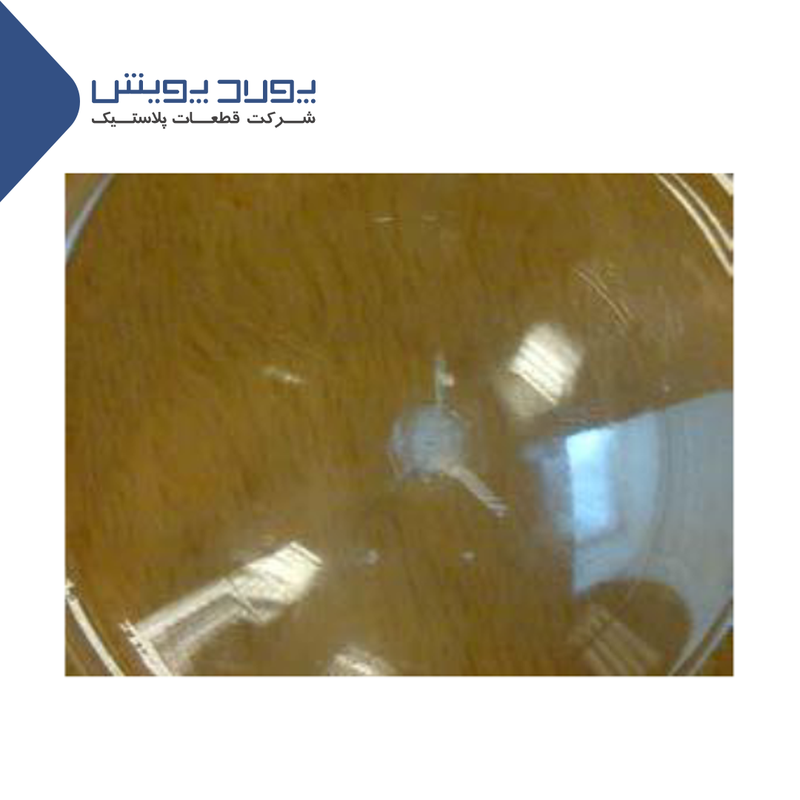
Opaque with haziness or opalescence
Description of the problem
Whitening is observed in some parts of the bottle.
The reasons for the problem and the proposed solution:
1) When the preform temperature reaches close to 120°C (250°F) or higher, for more than about 10 seconds, PET crystallizes and the result is opaque (white).
×× The preform temperature in the oven was too high:
++ Reduce the final temperature of the preform.
×× (single stage) Insufficient holding or cooling time.
++ (single stage) Increase holding temperature or cooling time.
2) (Single-stage) When the oven temperature is higher than the temperature suitable for baking, the preform sees more heat from the outside, which causes it to turn cloudy (white).
×× (two-stage) there is a problem with the ventilation of the oven.
++ (two-stage) increase the ventilation of the oven, until the temperature of the oven reaches below the temperature of the fan.
The mold temperature is above 65°C (150°F).
++ Check mold cooling.
3) There are some areas of the bottle that are white and it is not removed at the tailing stage.
The bleaching of the preform remains in the bottle.
++ To ensure that there are no white areas on the surface of the preform, control more preforms from different consignment batches.
4) (Two-stage) When the process is set for cold preforms but hot preforms enter the process, the temperature will be too high for these preforms.
×× (two-stage) cold and hot preforms (preform storage temperature conditions) are mixed in the feeding stage.
++ Make sure the temperature of the preforms is the same during the feeding phase (at least 12 hours at a constant temperature).
more details:
As the preform or bottle begins to cool slowly above 120°C (250°F), temperature-induced crystallization will begin to progress, and when the crystallinity reaches 3%, a cloudy, milky appearance appears. This type of turbidity and whiteness (caused by temperature) happens in the production stage of the preform, but excessive heat of the preform inside the oven will also cause this problem on the preform.
If the bleaching defect occurred during the preform production stage, it will not be removed during the bottle manufacturing stage and will be destroyed only when the crystalline areas are heated to the melting temperature.
Turbidity and bleaching due to thermal crystallization can be seen on the outer body of the bottle, while bleaching due to pearlescent defects or bleaching stress always occurs on the inside of the body.
Inadequate ventilation in the oven is also one of the possible causes of this problem.